Showing posts with label Video Tutorial. Show all posts

Wednesday, December 22, 2021

Holiday Express Cards & Video Tutorial with Franci and Julia

Hello there! It's Franci here with you today with a cute Christmas card, showcasing the Holiday Express stamp setAww look at my Christmas express with all the Santa's reindeer and gifts! I love it so much!!

Sunny Studio Stamps: Holiday Express Winter Holiday Card by Franci Vignoli (featuring Lacy Snowflake Dies, Slimline Dies, Stitched Rectangle Dies)

First of all I created a slimline panel with the Stitched Rectangle Dies ( using the partial die cutting technique) out of dark blue and white cardstock, then I die cut a snowy hill out of the white one using the Slimline Nature Borders Dies. I stamped, colored with Copics and die cut all the images and added lots of details to them all with my white gel pen.

I stamped my sentiment at the bottom of my snowy hill and glued it onto my blue panel. Then I created a slightly bigger card base and a matching panel out of kraft cardstock and glued down all my elements as you see. 

Sunny Studio Stamps: Holiday Express Winter Holiday Card by Franci Vignoli (featuring Lacy Snowflake Dies, Slimline Dies, Stitched Rectangle Dies)

I added all my images with foam adhesive and then drew little white dots here and there to create a snowy scene + I added some sparkle to all the Christmas gifts! 

Building this scene was so much fun, can't wait to wish one of my loved ones Happy Christmas with it! Thanks a lot for stopping by and have a lovely day!

------------------------------------------

Hello! It’s Julia here and this time I want to share this fun polar express card with you!

Sunny Studio Stamps: Holiday Express Winter Holiday Card by Julia Englich (featuring Lacy Snowflake Dies, Slimline Dies, Stitched Rectangle Dies)

For this one, I stamped the images from Holiday Express on Bristol Smooth cardstock and colored them with Zig Clean Color Markers.

Sunny Studio Stamps: Holiday Express Winter Holiday Card by Julia Englich (featuring Lacy Snowflake Dies, Slimline Dies, Stitched Rectangle Dies)

I ink blended a slimline background with Distress Oxide inks and added lots of snowy splatters! I used the Slimline Nature Borders to create a hill for my scene. I heat embossed the sentiment in white onto black cardstock.

Sunny Studio Stamps: Holiday Express Winter Holiday Card by Julia Englich (featuring Lacy Snowflake Dies, Slimline Dies, Stitched Rectangle Dies)

Then, it was already time to build my scene! I added critters and presents to the wagons and Santa to the train! I adhered a few Lacy Snowflakes to fill the background and then glued down the sentiment in the top right corner!


I just love creating scenes like this and I had so much fun with this one! If you want to know which colors I used and how the card came together, you can check out the video above!

I hope you have a wonderful holiday and a very Merry Christmas!

Sunny Studio Supplies Used:

Stitched Rectangle Dies
Shop at:
Sunny Studio
Holiday Express Stamps
Shop at:
Sunny Studio
Holiday Express Dies
Shop at:
Sunny Studio
Lacy Snowflakes Die
Lacy Snowflakes Die
Shop at:
Sunny Studio
Slimline Nature Borders
Shop at:
Sunny Studio

Wednesday, September 8, 2021

Crisp Autumn Cards with Julia and Franci

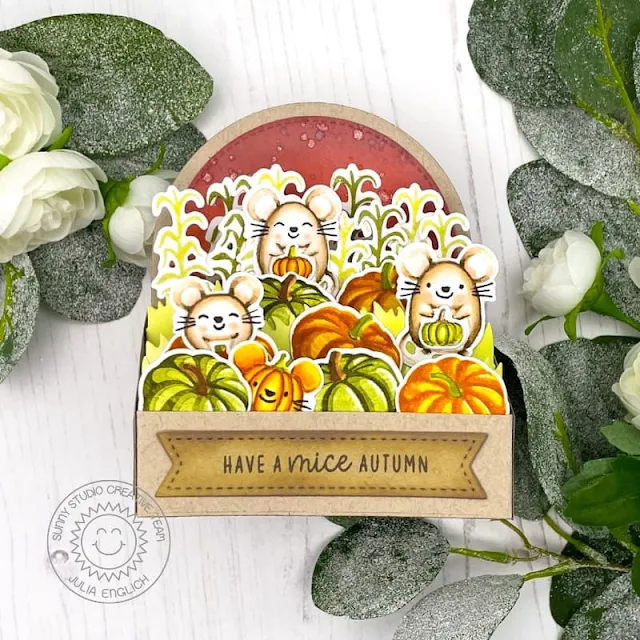
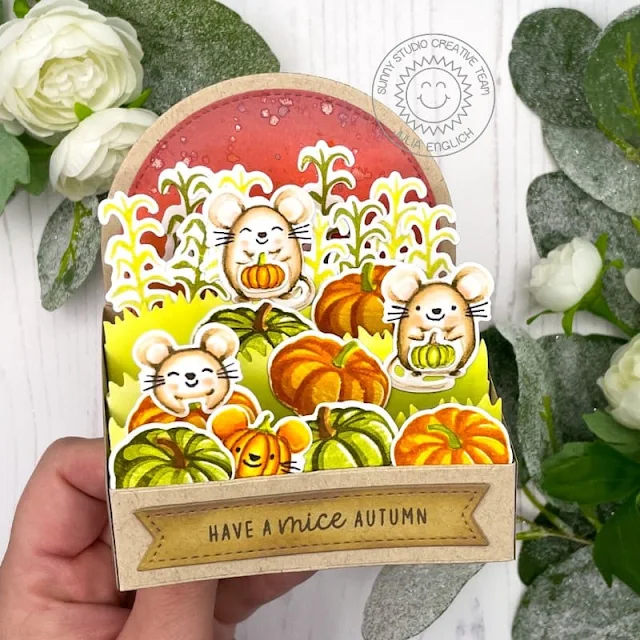
Hello crafty friends! It's Julia here and I am so excited to share this fun autumn box card with you!

Sunny Studio Stamps: Crisp Autumn Harvest Mice Autumn Themed Card by Julia Englich

First, I stamped the pumpkins from the Crisp Autumn layering stamp set with Distress Inks and the sweet mice from Harvest Mice with no-line coloring ink onto Strathmore Bristol Smooth cardstock. I wanted to match the look of the pumpkins, so I thought I would give no-line coloring a go! I had so much fun trying this new (to me) coloring technique!

Distress Inks used: green pumpkin: Shabby Shutters, Peeled Paint, Forest Moss,; stem: Tea Dye, Gathered Twigs; orange pumpkin: Dried Marigold layered with Mustard Seed, Wild Honey, Rusty Hinge; stem: Shabby Shutters, Peeled Paint.

Zig Markers used: 999; 222; 53, 46, 43; 52, 61, 60; 76, 64, 65.


Sunny Studio Stamps: Crisp Autumn Harvest Mice Autumn Themed Card by Julia Englich

I ink blended the background and grass borders with Distress Oxides and I also added a little bit of shading to the panels on the outside of the box. I assembled the box and then it was time to add in all the adorable little mice and pumpkins!


I had lots of fun creating this fun autumn scene and I really hope

------------------------------------------

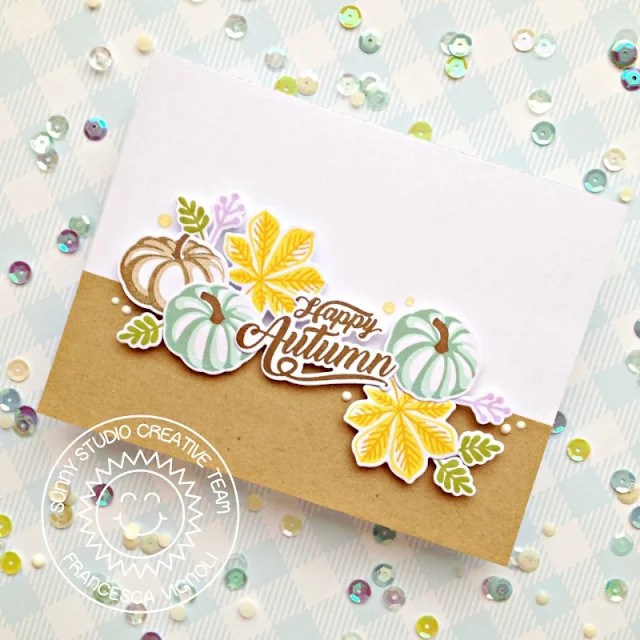
Hello! It's Franci here with you today, with a Fall themed card to celebrate the upcoming season. This new autumn themed set is so cool! It features layering pumpkins and leaves and look at that beautiful sentiment! 


Sunny Studio Stamps: Crisp Autumn Autumn Themed Card by Franci Vignoli


First of all I created a white card base and covered the front with a stripe of kraft cardstock. Then I stamped all my images from the 
Crisp Autumn set using a combo of Memento Drop inks and Lawn Fawn inks. I die cut them out using their coordinated dies and glued them down into this fall scene with foam adhesive.


Sunny Studio Stamps: Crisp Autumn Autumn Themed Card by Franci Vignoli


I added some white embellishments here and there with my Tonic Nuvo Drops and this card is ready to wish "Happy Autumn" to one of my friends! 

Thanks a lot for stopping by today and have a lovely day! 

Sunny Studio Supplies Used:

Crisp Autumn Stamps
Crisp Autumn Stamps
Shop at:
Sunny Studio
Crisp Autumn Dies
Crisp Autumn Dies
Shop at:
Sunny Studio
Harvest Mice Stamps
Harvest Mice Stamps
Shop at:
Sunny Studio
Harvest Mice Dies
Harvest Mice Dies
Shop at:
Sunny Studio

Wednesday, July 7, 2021

Chloe Alphabet Focused Cards and Video Tutorial with Julia and Franci

Hey crafty friends! It’s Julia here with a fun birthday card!

Sunny Studio Stamps: Chloe Alphabet Dies Alpaca Holiday Floating By Birthday Card by Julia Englich


First, I stamped my images from Alpaca Holiday & Floating By onto Bristol Smooth cardstock and then I used my Zig Clean Color Real Brush Markers to color them in!

I cut the second larges Fancy Frames Circle die 4 times out of white cardstock and layered the die cuts for more dimension. Then, I die cut the third largest of the Stitched Circle Large dies twice, once for my background and a second time for the grassy hill. I ink blended the circle die cuts using Distress Oxide inks. To create my hill, I die cut one of the stitched circles using the Slimline Nature Borders dies. I also die cut the letter HAPPY using the Chloe Alphabet dies and I ink blended those as well.

Sunny Studio Stamps: Chloe Alphabet Dies Alpaca Holiday Floating By Birthday Card by Julia Englich

For the background of my card, I used the Quilted Hearts Embossing Folder and adhered it to an A2 sized card base. Then, I added my ink blended circle, grassy hill and the scalloped frame on top. Finally, it was time to add my cute images to the scene! Below the little scene I adhered the letters for the first part of my sentiment. For the second part, I used a sentiment from the Candy Shoppe stamp set and I heat embossed it in white.

As a finishing touch, I added white gel pen details to the balloons! If you would like to see how this card came together, you can watch the video below - or on my YouTube channel, Craft Room Adventures!


Inks used: Tumbled Glass, Salty Ocean, Cracked Pistachio, Evergreen Bough
Zig Markers used:
999; 21; 32; 50; 33; 73, 64.

Thank you so much for spending time with me today! Have an awesome week!

----------------------------------------------

Hi there and happy Wednesday! It's Franci here with you today, with a fun card showcasing the Chloe Alphabet Dies set. Alphabet dies are so cool, I loved using them to add a little something to my sentiment here!

Sunny Studio Stamps: Chloe Alphabet Dies Harvest Mice Seasonal Trees Card by Franci Vignoli

First of all I die cut my white panel using the Stitched Rectangles dies and the partial die cutting technique and inked the center with Distress Ink. Then I created a coordinated card base out of light grey cardstock.

Then I stamped, colored with Copics and die cut all the images from these different sets: Harvest Mice set + coordinated dies and Seasonal Trees set + coordinated dies. I glued everything down into this cute scene and added some details with a white gel pen.

Sunny Studio Stamps: Chloe Alphabet Dies Harvest Mice Seasonal Trees Card by Franci Vignoli

I die cut all the "apple" letters out of red cardstock, using the Chloe Alphabet set and added them as well, after stamping the other part of my sentiment from the Fruit Cocktail set. 

Finally I mounted my decorated panel onto my card base with more foam adhesive and added a coat of glossy accents onto my die cut word - the effect in real life is soo cool!

Hope you like this card as much as I do and thanks a lot for stopping by today!

Sunny Studio Supplies Used:

Candy Shoppe Stamps
Candy Shoppe Stamps
Shop at:
Sunny Studio
Chloe Alphabet Dies
Chloe Alphabet Dies
Shop at:
Sunny Studio
Stitched Rectangle Dies
Shop at:
Sunny Studio
Fancy Frames-Circle Dies
Shop at:
Sunny Studio
Fruit Cocktail Stamps
Shop at:
Sunny Studio
Alpaca Holiday Stamps
Shop at:
Sunny Studio
Alpaca Holiday Dies
Alpaca Holiday Dies
Shop at:
Sunny Studio
Quilted Hearts Embossing
Shop at:
Sunny Studio
Seasonal Trees Stamps
Shop at:
Sunny Studio
Seaonal Trees Dies
Seaonal Trees Dies
Shop at:
Sunny Studio
Floating By Stamps
Floating By Stamps
Shop at:
Sunny Studio
Floating By Dies
Floating By Dies
Shop at:
Sunny Studio
Slimline Nature Borders
Shop at:
Sunny Studio
Harvest Mice Stamps
Harvest Mice Stamps
Shop at:
Sunny Studio
Harvest Mice Dies
Harvest Mice Dies
Shop at:
Sunny Studio
Stitched Circle Large Dies
Shop at:
Sunny Studio

Wednesday, June 30, 2021

Candy Shoppe Cards and Video Tutorial with Franci and Julia

Hi there! Franci here with you today with a sweet card showcasing the Candy Shoppe set. Aww I love this set so much! 

Sunny Studio Stamps: Candy Shoppe Beach Buddies Birthday Card by Franci Vignoli

First of all I created my card base out of white cardstock, then masked the front bottom and inked the top with Distress Ink.

Then I stamped, colored with Copics and die cut all my images from these sets: Candy Shoppe + coordinated dies and Beach Buddies + coordinated diesI love these little bears surrounded by sweets and candies, they're so cute! 

Sunny Studio Stamps: Candy Shoppe Beach Buddies Birthday Card by Franci Vignoli

I glued everything in place with foam adhesive, stamped my sentiment and added some details with a white gel pen. Finally I added some Birthday Cake Dot Sprinkles confetti here and there.

I'm so happy about how this card turned out and I hope you like it too :) Have a lovely day!

-------------------------------------------

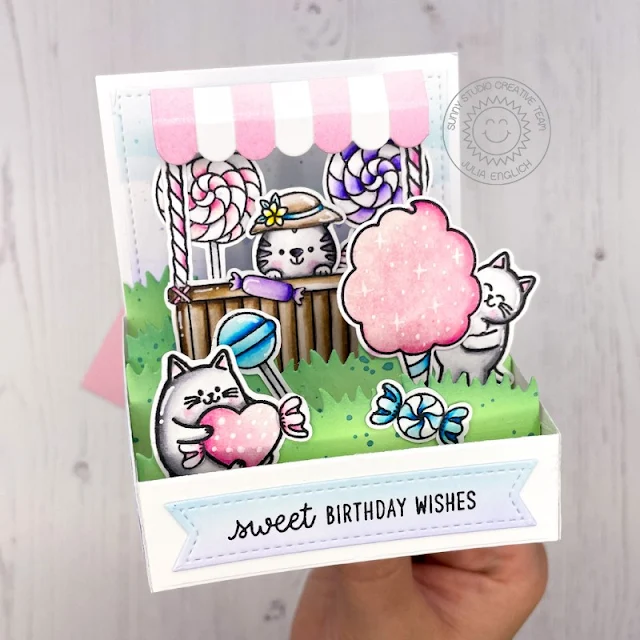
Hey crafty friends! It’s Julia here with sweet birthday box card!

Sunny Studio Stamps: Candy Shoppe Beach Buddies Meow & Furever Tiki Time Stitched Rectangle Dies Birthday Card by Julia Englich


First, I stamped out all of my adorable images from Candy ShoppeMeow & FureverBeach Buddies and Tiki Time onto Strathmore Bristol Smooth paper and I used Zig Clean Color Real Brush Markers to color them in. 

Sunny Studio Stamps: Candy Shoppe Beach Buddies Meow & Furever Tiki Time Stitched Rectangle Dies Birthday Card by Julia Englich

Then, to create the box I used a die set, but you can also do it without any specialty dies! You will need one back panel measuring 3 1/2 x 4 1/2", two side panels 2 1/2" long, 2 slanting downwards to 1" in height. Those side panels are scored at 1/2" on the taller side. Finally, for the front of the box you need a strip of cardstock 4 1/2 x 1 " scored at 1/2" and 4". For the inside grassy borders, the panels measure 4 1/4 x approx. 1" and they are scored at 3/8" and  3 7/8". For the background of my box, I used the second to largest of the Stitched Rectangle dies and I just trimmed a little bit off at the bottom.  

I ink blended the stitched panel using a cloud stencil and Distress Oxide inks. I also added the same ink colors to the sides of the box. For my sentiment strip, I used the banner dies from the Stitched Rectangle dies, added the same ink colors I used for the background and stamped the sentiment from Candy Shoppe in black.

Inks used: Tumbled Glass, Shaded Lilac, Spun Sugar, Kitsch Flamingo, Cracked Pistachio, Evergreen Bough Zig Markers used:  999, 904, 97, 94, 10; 64, 68; 52, 55; 200, 202; 803, 80;32, 31

Sunny Studio Stamps: Candy Shoppe Beach Buddies Meow & Furever Tiki Time Stitched Rectangle Dies Birthday Card by Julia Englich


To assemble the box, I added liquid glue to the flaps of the side pieces and adhered them to the back panel. I adhered my stitched background piece to the back and one of the grassy borders on top of that. Then, I added the front piece to the front of the left side panel and I also started adding my grassy hills with liquid glue to the inside of the left side panel. Once they had a bit of time to dry, I flipped the pieces over to the right, lined them up and added glue to all the flaps. Then I just had to close the right side panel onto the adhesive and give it some time to dry! I added the side panels and the sentiment banner to the outside of the box.

Sunny Studio Stamps: Candy Shoppe Beach Buddies Meow & Furever Tiki Time Stitched Rectangle Dies Birthday Card by Julia Englich


Finally, it was time to build my scene. I wanted to have a little candy stand, so I used the roof of the Sweet Treat House Add-On, the bottom of the tiki bar from Tiki Time and the twizzler sticks from Candy Shoppe to build it! I added all the accessories to the adorable little kitties and I adhered everything to the grassy borders inside the box!

Check out the video tutorial below to see how this card came together:


I had so much fun making this sweet box card and I really hope you like it! Thanks so much for stopping by today! Have an amazing week!

Sunny Studio Supplies Used:

Beach Buddies Stamps
Shop at:
Sunny Studio
Beach Buddies Dies
Beach Buddies Dies
Shop at:
Sunny Studio
Candy Shoppe Stamps
Candy Shoppe Stamps
Shop at:
Sunny Studio
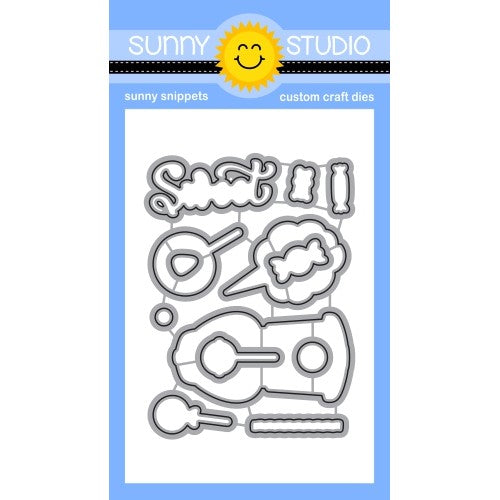
Candy Shoppe Dies
Candy Shoppe Dies
Shop at:
Sunny Studio
Tiki Time Stamps
Tiki Time Stamps
Shop at:
Sunny Studio
Tiki Time Dies
Tiki Time Dies
Shop at:
Sunny Studio
Stitched Rectangle Dies
Shop at:
Sunny Studio
Sweet Treats House Add-on
Shop at:
Sunny Studio
Meow & Furever Stamps
Shop at:
Sunny Studio
Meow & Furever Dies
Meow & Furever Dies
Shop at:
Sunny Studio

Wednesday, March 17, 2021

Lovable Llama Cards and Video Tutorial with Julia and Franci

Hey crafty friends! It’s Julia here with a fun interactive birthday card! I used the adorable Lovable Llama stamp set for this one! 

Sunny Studio Stamps: Lovable Llama Spring Scenes Floating By Sliding Window Dies Birthday Card by Julia Englich

To create my scene I also used the Spring Scenes, Floating By and Inside Greetings Birthday stamp sets as well as the Sliding Window and Fluffy Clouds dies. 

Sunny Studio Stamps: Lovable Llama Spring Scenes Floating By Sliding Window Dies Birthday Card by Julia Englich

I really wanted to add a sentiment that read "Llama tell you" so I used Kinsley Alphabet stamps for my custom greeting!

Sunny Studio Stamps: Lovable Llama Spring Scenes Floating By Sliding Window Dies Birthday Card by Julia Englich

I had so much fun with the sliding window mechanism! It's amazing for adding an additional message or a little hidden scene to your cards! If you would like to see how this card came together, you can watch the video below - or on my YouTube channel, Craft Room Adventures.


Inks used: background: Twisted Citron and Mowed Lawn Distress Ink as well as Tumbled Glass and Salty Ocean Distress Oxide. Copic Markers used: YG11, YG13, YG17, BG99; Y11, Y13, Y15, Y17; R20, R22; R24; R27; R29, R39; RV21, RV23, RV25, RV29; B21, B23, B26, B28; BG11, BG13, BG15, BG18; V000, V01, V04, V05, V09; R21; E30, E31, E33, E35, E37, E39; 0.

Thank you so much for stopping by today! Have an amazing day!

-----------------------------------------------

Hi there! Franci here with you, showcasing the new Lovable Llama set, the cutest ever!! So I had to make another rocking card here because I think they are so much fun and they are so easy to make with the new Stitched Circle Large Dies and the Scalloped Circle ones

Sunny Studio Stamps: Lovable Llama Banner Basics Birthday Card by Franci Vignoli

First of all I die cut all the panels: the largest one out of this colorful patterned paper from the Spring Sunburst 6x6 paper set and the smallest out of white cardstock. I later inked it up in the center with some Spiced Marmalade Distress ink Oxide.

Then I started working on my images, I combined lots of elements from these different sets: Lovable Llama + coordinated diesBalloon Rides coordinated diesBanner Basics coordinated dies. I stamped them onto white cardstock, colored them with Copics and cut them out. I also added my sentiment from the Inside Greetings Birthday set.

Sunny Studio Stamps: Lovable Llama Banner Basics Birthday Card by Franci Vignoli

I glued down all my images to the scalloped circle, then folded in half my stitched one and adhered my decorated panel just to one half of my colorful one. As you can see I also added some elements with acetate strips to give my design more interest and the card fit a standard size envelope perfectly so it's super easy to mail! Finally I added some details with a white gel pen and some clear sequins.

I hope you like it and thank you so much for stopping by today! 

Sunny Studio Supplies Used:


Sliding Window Dies
Sliding Window Dies
Shop at:
Sunny Studio
Spring Sunburst 6x6 Paper
Shop at:
Sunny Studio
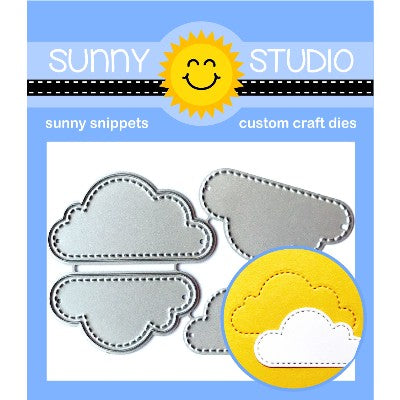
Fluffy Clouds Dies
Fluffy Clouds Dies
Shop at:
Sunny Studio
Banner Basics Stamps
Shop at:
Sunny Studio
Banner Basics Dies
Banner Basics Dies
Shop at:
Sunny Studio
Floating By Stamps
Floating By Stamps
Shop at:
Sunny Studio
Floating By Dies
Floating By Dies
Shop at:
Sunny Studio
Kinsley Alphabet Stamps
Shop at:
Sunny Studio
Spring Scenes Stamps
Shop at:
Sunny Studio
Spring Scenes Dies
Spring Scenes Dies
Shop at:
Sunny Studio
Balloon Rides Stamps
Shop at:
Sunny Studio
Balloon Rides Dies
Balloon Rides Dies
Shop at:
Sunny Studio
Inside Greetings Birthday
Shop at:
Sunny Studio
Lovable Llama Stamps
Shop at:
Sunny Studio
Lovable Llama Dies
Lovable Llama Dies
Shop at:
Sunny Studio
Scalloped Circle Mat 1 Dies
Shop at:
Sunny Studio
Stitched Circle Large Dies
Shop at:
Sunny Studio